This week in Old School we've made some small changes to Great Kourend, adding in various training spots and NPCs, Zooknock has devised a way for you to relive your Monkey Madness II experience and necromancers can now create teleport tablets!
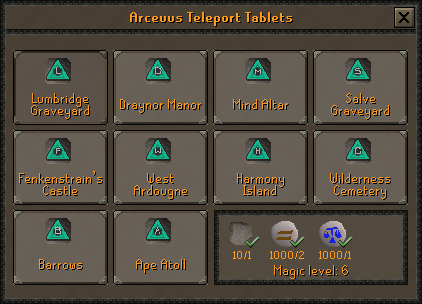
Necromancy teleport tablets
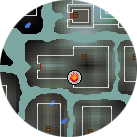
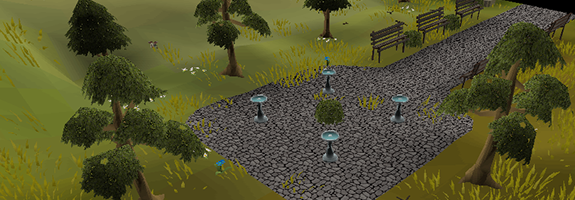
It is now possible to create necromancy teleport tablets in the Arceuus area within Great Kourend. Head to the building shown below, in which you can find a lectern used to create necromancy teleport tablets.
In order to create necromancy teleport tablets you must have the Magic level to cast the spell, the runes for the spell as well as a dark essence block. You must also be on the necromancy spellbook.
The teleport tablets you create are tradeable and, as with all other teleport tablets in game, necromancy teleport tablets are usable regardless of which spellbook you are on. In addition to this, no Arceuus favour is required to use the teleport tablets.
Changes to Great Kourend
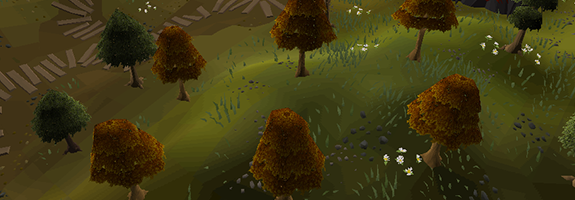
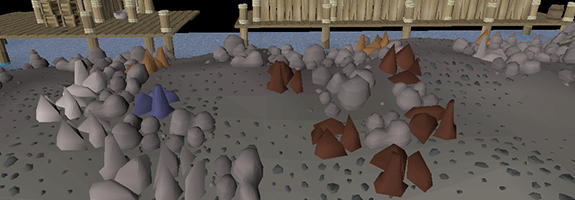
Following feedback from the community we have taken the first steps to bring a little more life to Great Kourend. Throughout the city you can now find mines, scattered trees, fishing spots and various monsters you might expect to find roaming around RuneScape.
On top of these additions, a few new shopkeepers have shown up in different parts of the city. If you have 20% favour in the relevant house, you can now grab weapons and armour from Shayzien, staves and runes from Arceuus and food from Piscarilius!
Repeatable Monkey Madness II boss battle
Monkey Madness II spoilers below
Monkey Madness II features one of the most challenging quest bosses in Old School RuneScape: Glough. To get through the three stages of this fight is something to remember, and now you can relive the experience.
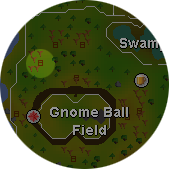
With the help of Dom Onion, Zooknook has devised a way to send you back to that fight. Players who have completed Monkey Madness II can now talk to Zooknook, located in a house just north of the gnomeball field in the gnome stronghold, to fight Glough once more.
All of your battles with Glough are timed, letting you know just how quickly you were able to take him down. If you happen to die during a return trip to Glough, you will not lose your items.
Demonic gorilla changes
Following player feedback, a few changes have been made to Demonic gorillas.
A large single way area has been added around the center of the cavern.
Loot broadcasts are now sent for killing Demonic gorillas in the multicombat area.
The attack which triggers a Demonic gorilla to change prayer is no longer blocked.
The hunting behaviour has been tweaked to prevent the gorillas from switching to you as you run by other players in the middle of fighting.
The maximum distance they can travel from their spawn has been increased substantially.
Kills of Demonic and Tortured gorillas are now tracked. This information can be accessed via Nieve�s gravestone outside of the crash site.
In other news...
Castle Wars halos have been graphically improved and now look to glow.
Teleport tablets added since Old School�s launch have been made consistent with the style of the original teleport tablets.
For those who have completed Monkey Madness II, there is now a bank chest by Jumaane in Marim�s bank.
Rune scimitars have been removed from Maniacal monkey drop tables.
An estate agent has opened an agency in Hosidius house of Great Kourend.
The clickzone for the conveyor belt found in the Blast furnace has been increased in size.
It is now possible to use the Grand Tree seed pods without emptying your hands.
World 367 is now a group questing themed world.
Bugfixes
It is no longer possible to enter the instanced areas of Monkey Madness II whilst skulled in Deadman Mode.
While it is not possible to complete the Ape atoll agility course as a human, you will no longer be put in to jail when you do so if you have completed Monkey Madness II.
Assistant Le Smith is no longer found on Ape Atoll after Monkey Madness II.
Unnecessary quest items from Monkey Madness II are now deleted when you complete the quest.
The NPC contact spell has been updated to reflect the events of Monkey Madness II.
Missing blocking has been added to a few tiles of the Ape Atoll bunker.
2h Sword defend animations should no longer take priority over attack animations.
Fixed an issue with transmogrification checks whilst riding a gorilla in Monkey Madness II.
A rockface which could not be scaled in Monkey Madness II now displays the option correctly.
The dwarfs delivering ore to the blast furnace no longer have a Talk-to option as they had no dialogue associated with them.
It is now possible to reobtain the Holy table napkin from Sir Galahad if lost prior to completing the Holy Grail quest.
Monastery is now spelled correctly in some achievement diary dialogue.
Fixed a grammar mistake in dialogue with the Sophanem guards.
Several typos in Monkey Madness II have been corrected.
Completing the platform section of Monkey Madness II will now consistently stop the camera from shaking.
A typo has been corrected in the Tourist Trap quest.
The area north of Gnome Stronghold should now match the area accessed in Monkey Madness II.